In this tutorial, I will share how to create a simple To Do Application using NodeJS Rest API. We will perform the CRUD operation using MongoDB for our database. We also will be using mongoose, a javascript library to make us easier to work with MongoDB.
Installing MongoDB
- Go to https://www.mongodb.com/ and choose Product – Software – MongoDB Server and download the file according to your operating system.
- Move the file to your user directory, extract the downloaded file, rename the folder to ‘mongo’, and create another folder named ‘mongo-data’.
- Open your terminal command, go to the mongo/bin folder and type the following command to activate : ./mongod –dbpath ~/mongo-data/
- Open a new tab to try to put some commands. Type ./mongo
- Try to input a command, for example: > db.Todos.insert({text:’Create Node Tutorial’})
- Fetch the data by typing this command : > db.Todos.find(). We will get an object that we have just created.
- Close the connection by typing Ctrl + C.
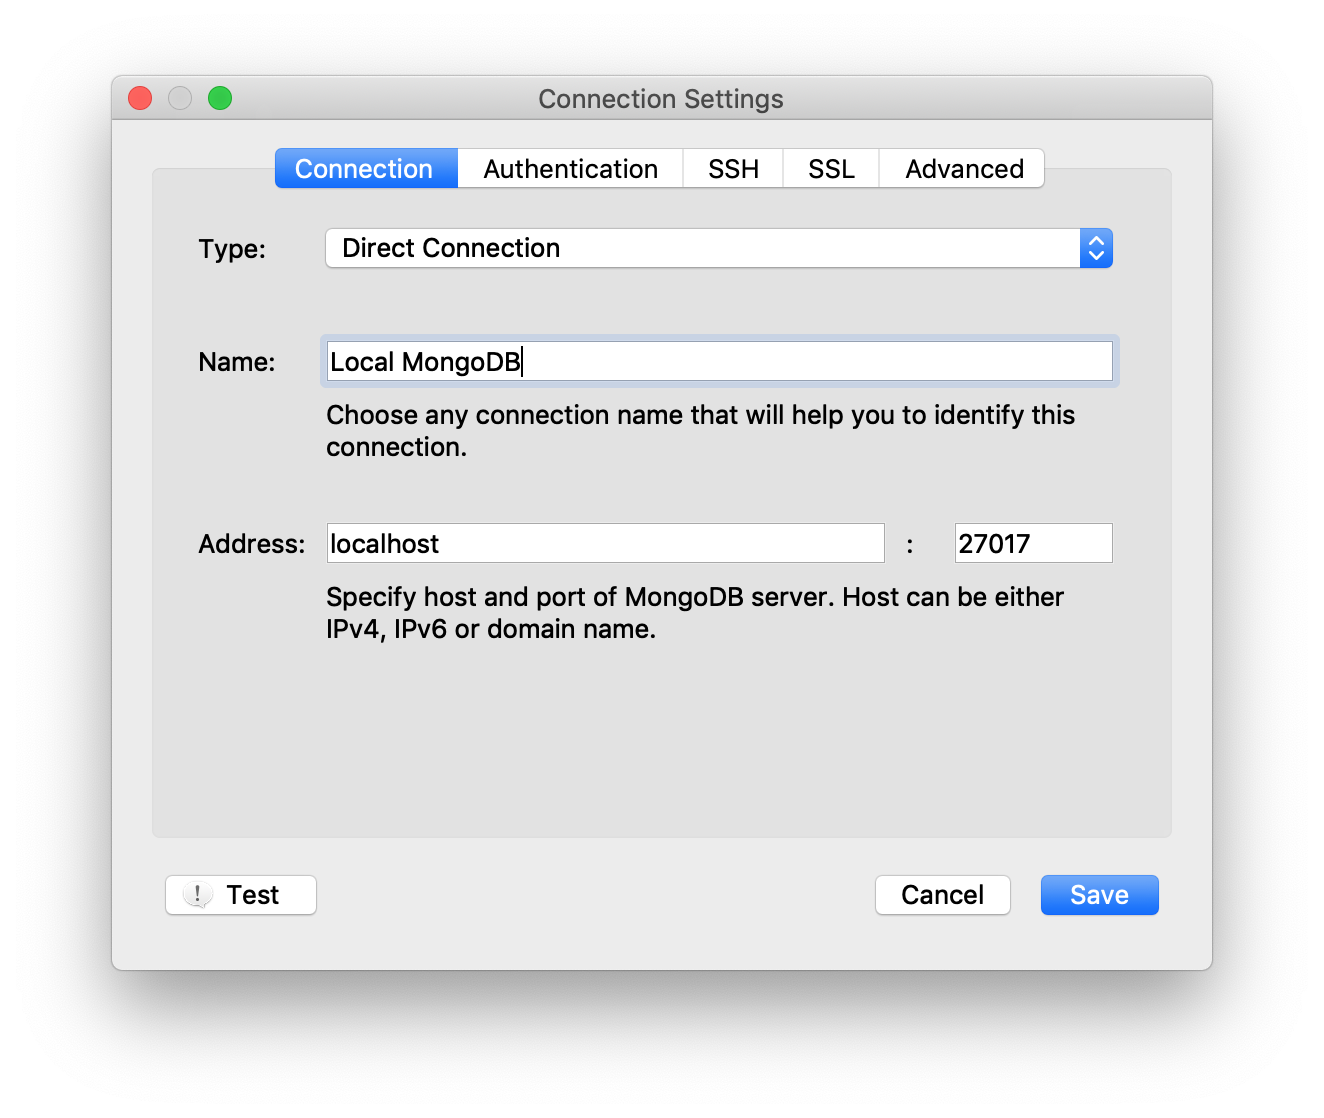
Installing Robo 3T (Robomongo)
- Download the installer from https://robomongo.org/
- Download Robo 3T and extract the compressed file.
- Connect to your local database :
- The Todo collection that we’ve created before will appear.
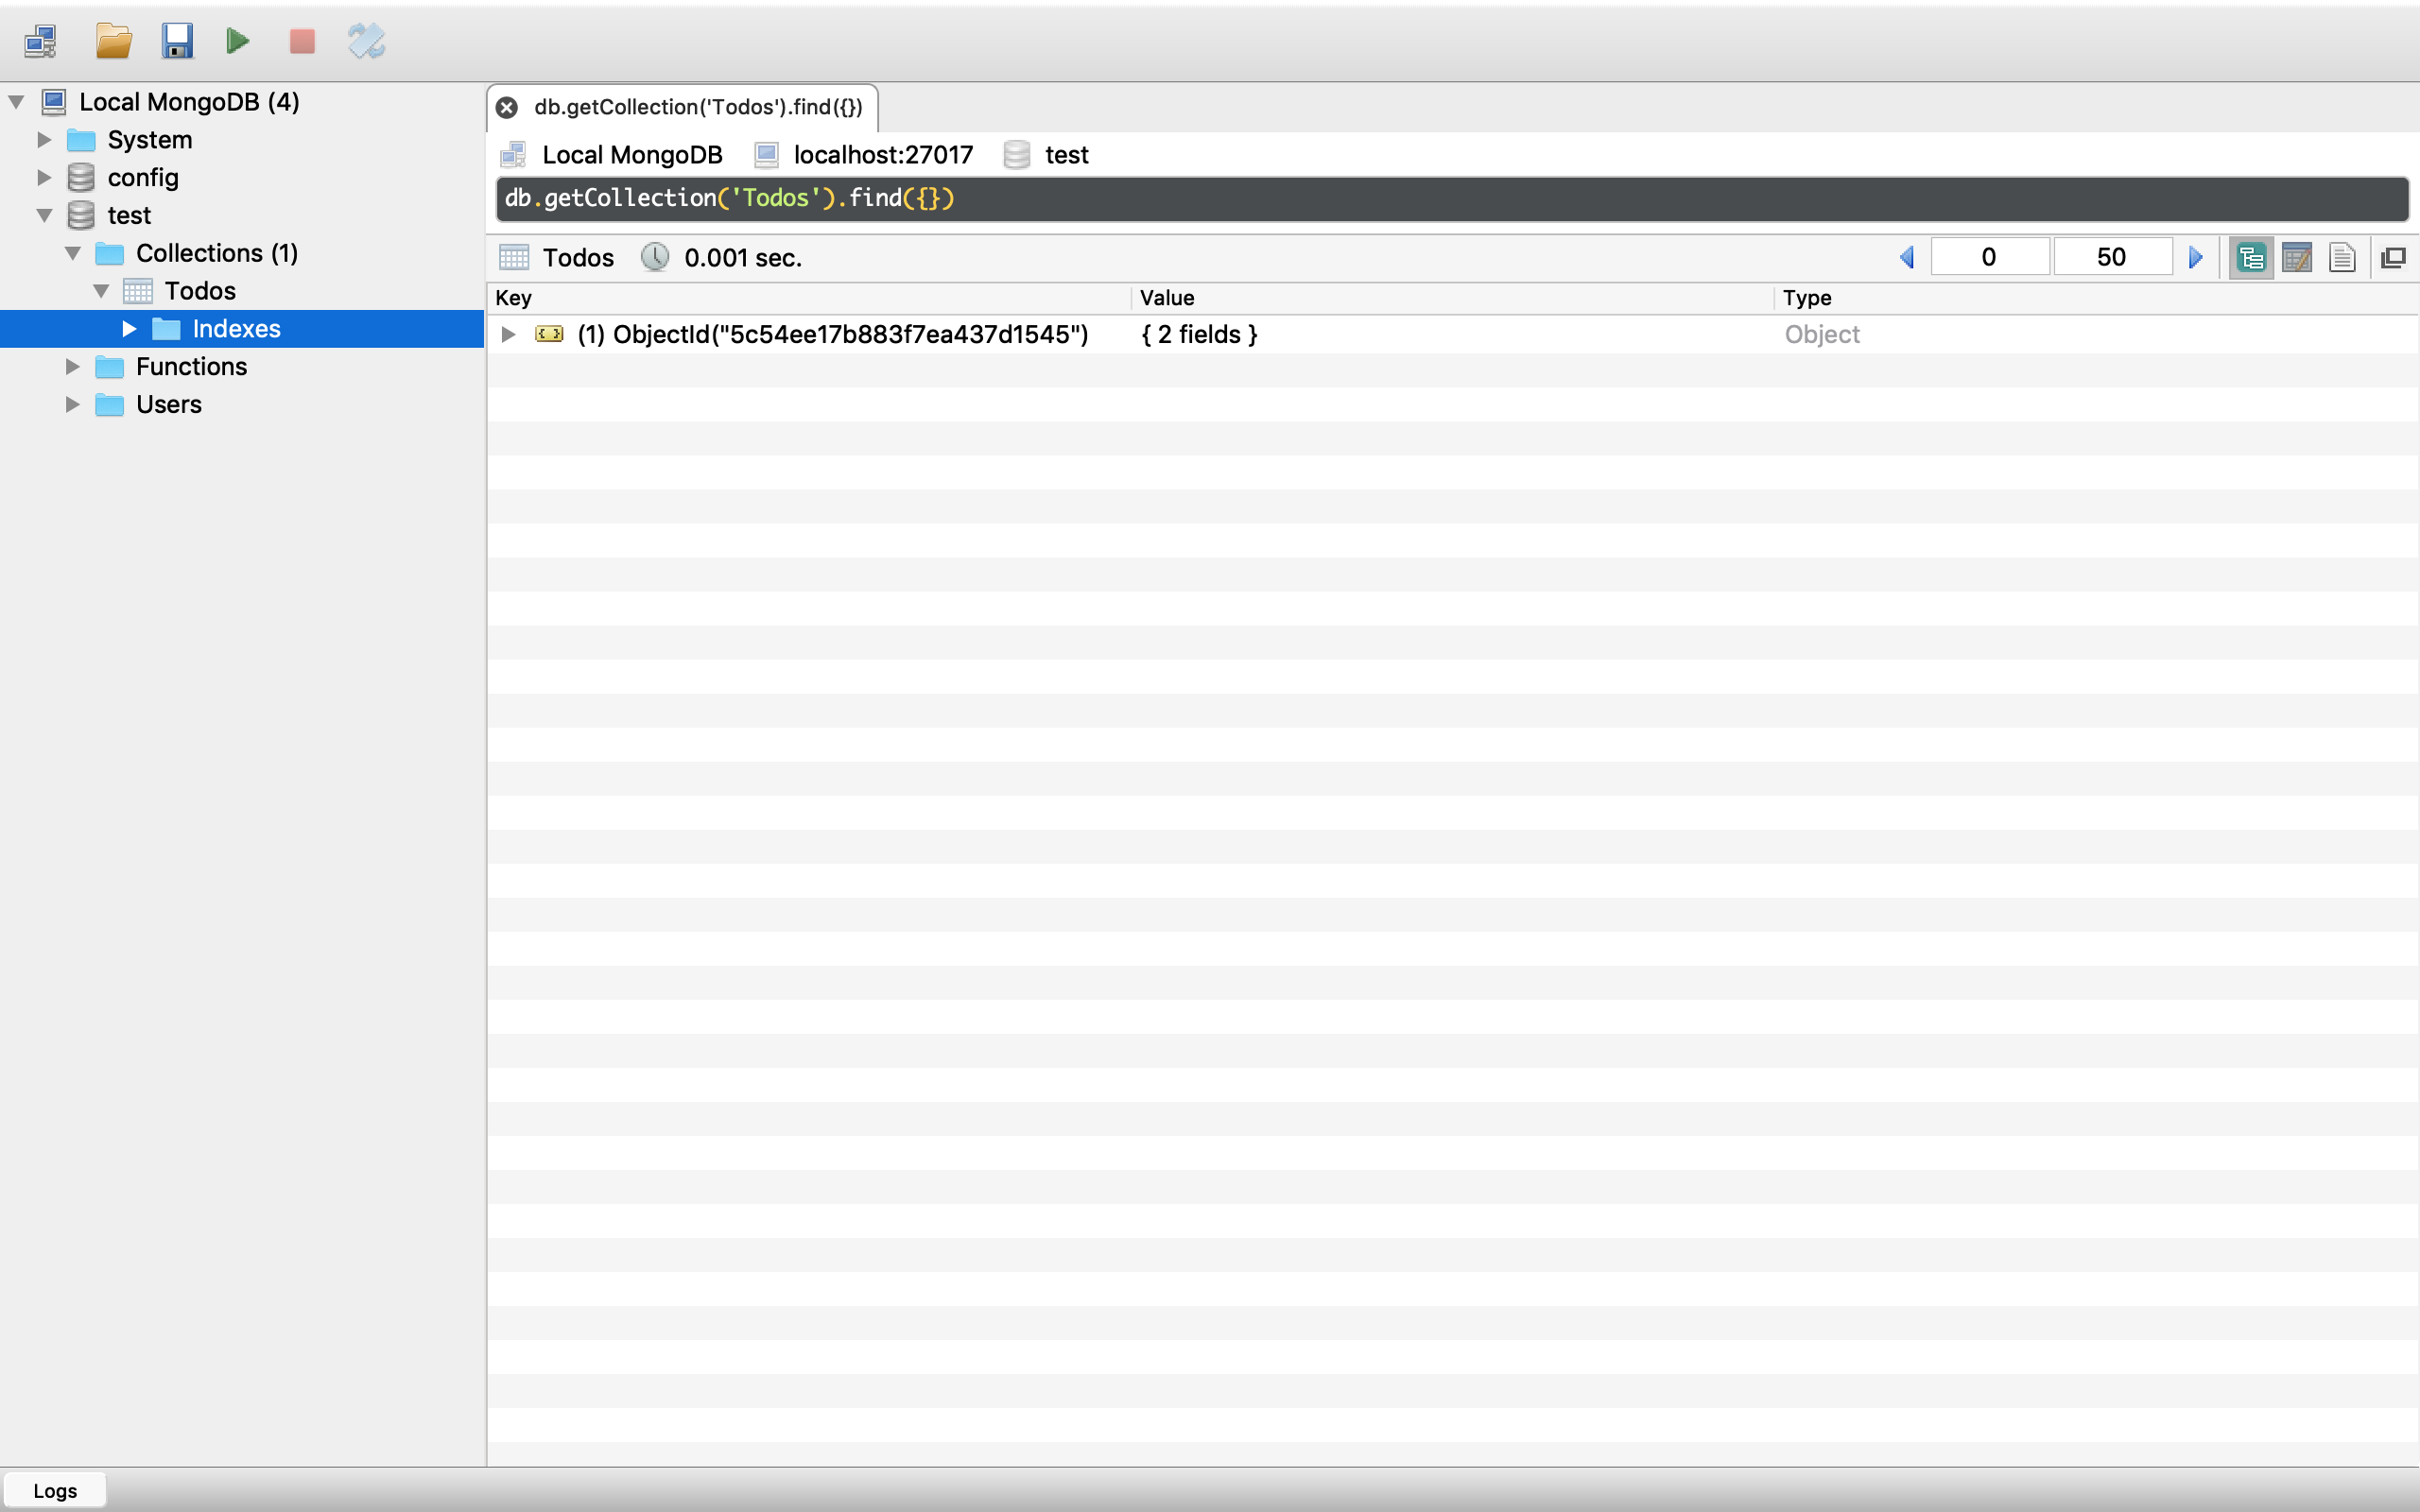
Collection in NoSQL is a table in SQL. Row and Record in SQL are called Document in NoSQL. Inside the SQL, we may call column. In NoSQL, we call it Field.
Connecting Node Application to MongoDB Database
- In your preferred directory (Desktop or Sites directory or else), create a new folder ‘node-todo-api’.
- Go inside the directory and initialize node application using the command: > npm init. Use the default setting using enter.
- Install mongodb : npm install [email protected] –save
- Create a new folder ‘testing’ for testing. and inside it create a new file mongodb-connect.js. Type node testing/mongodb-connect.js
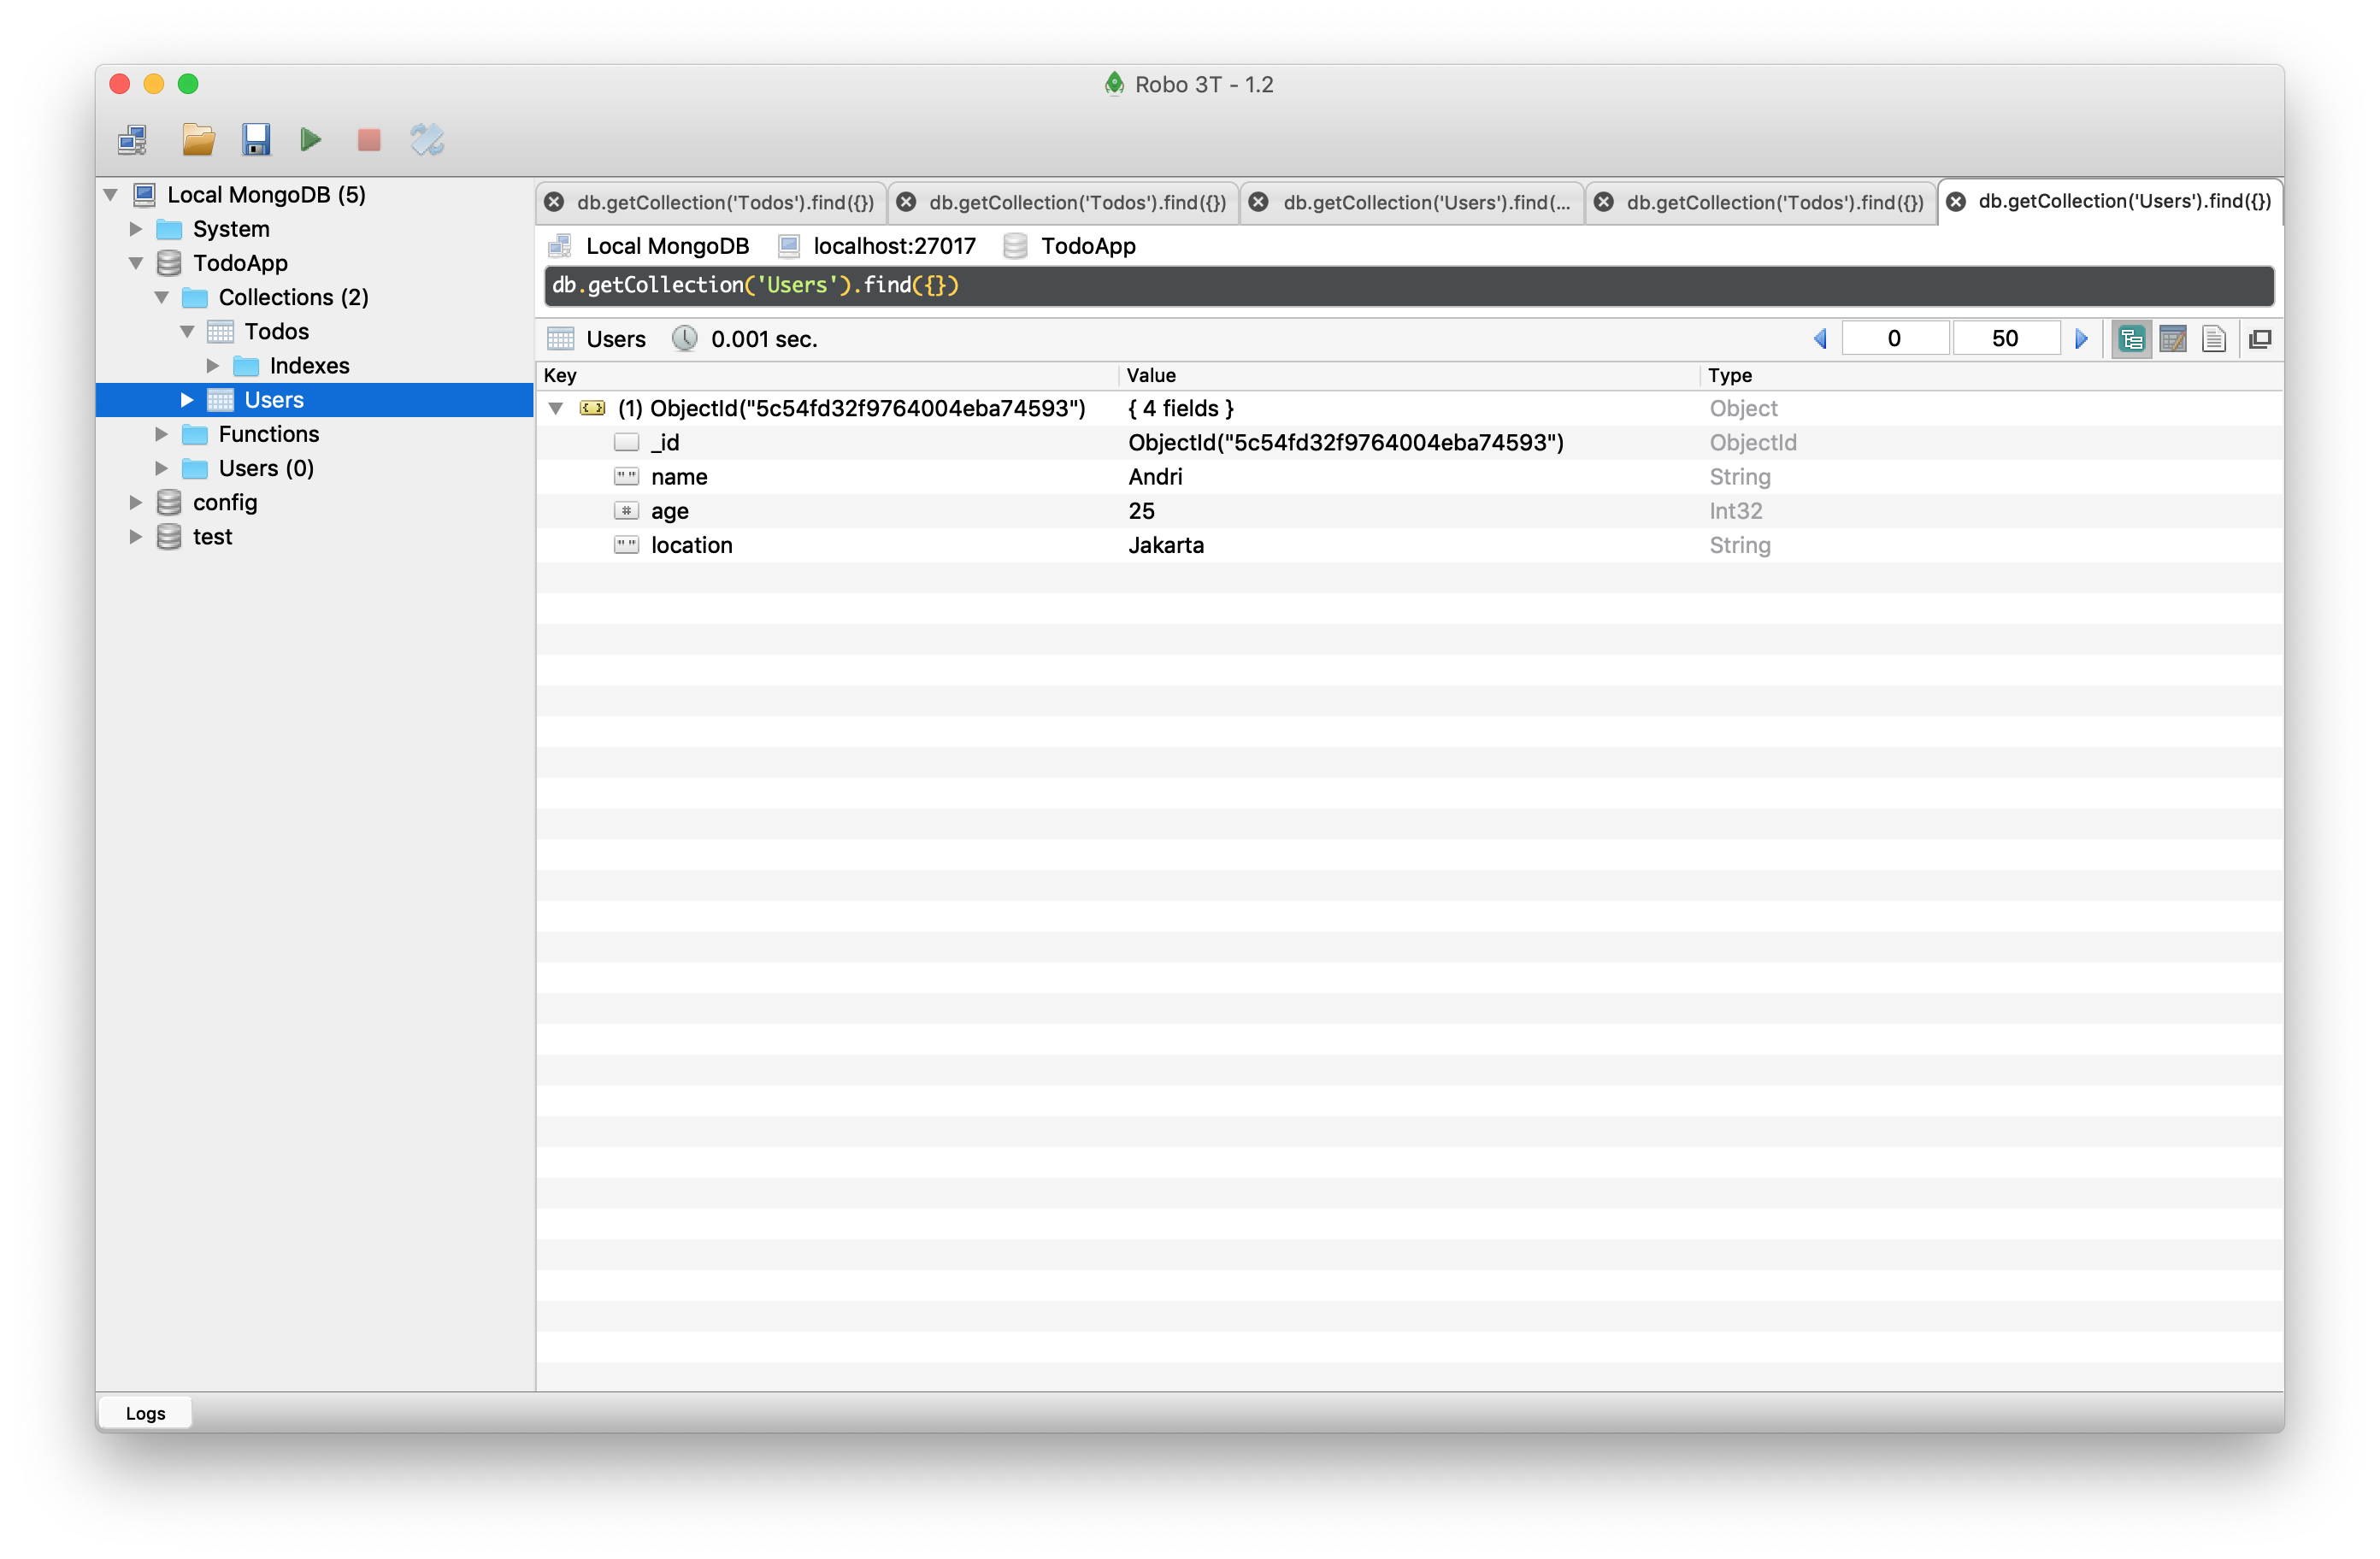
1234567891011121314151617181920212223242526272829303132const MongoClient = require('mongodb').MongoClient;MongoClient.connect('mongodb://localhost:27017/TodoApp', { useNewUrlParser: true }, (err, client) => {if(err){return console.log('Unable to Connect to MongoDB Server');}console.log('Connected to MongoDB Server');const db = client.db('TodoApp')db.collection('Todos').insertOne({text : 'Something to do ',completed: false}, (err, result) => {if(err){return console.log('Unable to insert to do',err);}console.log(JSON.stringify(result.ops, undefined, 2));})db.collection('Users').insertOne({name : 'Andri',age : 25,location: 'Jakarta'}, (err, result) => {if(err){return console.log('Unable to insert to do',err);}console.log(JSON.stringify(result.ops, undefined, 2));})client.close();}); - Open Robo3T, you will find the data that you’ve created :
 \
\
Mongoose ORM
Mongoose is a fantastic npm library. Mongoose makes it really easy to structure your data. We can perform validation of our data.
1. Install Mongoose
To install mongoose, type the following command:
|
1 |
npm mongoose@5.4.9 --save |
2. Create server.js
Create a new folder ‘server’ and create a file named ‘server.js’ inside that directory.
|
1 2 3 4 5 6 7 8 9 10 11 12 13 14 15 16 17 18 19 20 21 22 23 24 25 26 27 28 29 30 31 32 33 34 35 36 37 38 |
const mongoose = require('mongoose'); mongoose.Promise = global.Promise; mongoose.connect('mongodb://localhost:27017/TodoApp',{ useNewUrlParser: true }); const Todo = mongoose.model('Todo', { text: { type: String }, completed: { type: Boolean }, completedAt: { type: Number } }); const newTodo = new Todo({ text: 'Cook lunch' }); newTodo.save().then((doc) => { console.log('Saved to do',(doc)) }, (e) => { console.log('Unable to save',e); }); const otherTodo = new Todo({ text: 'Feed the cat', completed: true, completedAt: 123 }); otherTodo.save().then((doc) => { console.log(JSON.stringify(doc, undefined, 2)) }, (e) => { console.log('Unable to save',e) }); |
3. Run the file
Use the command :
|
1 |
node server/server.js |
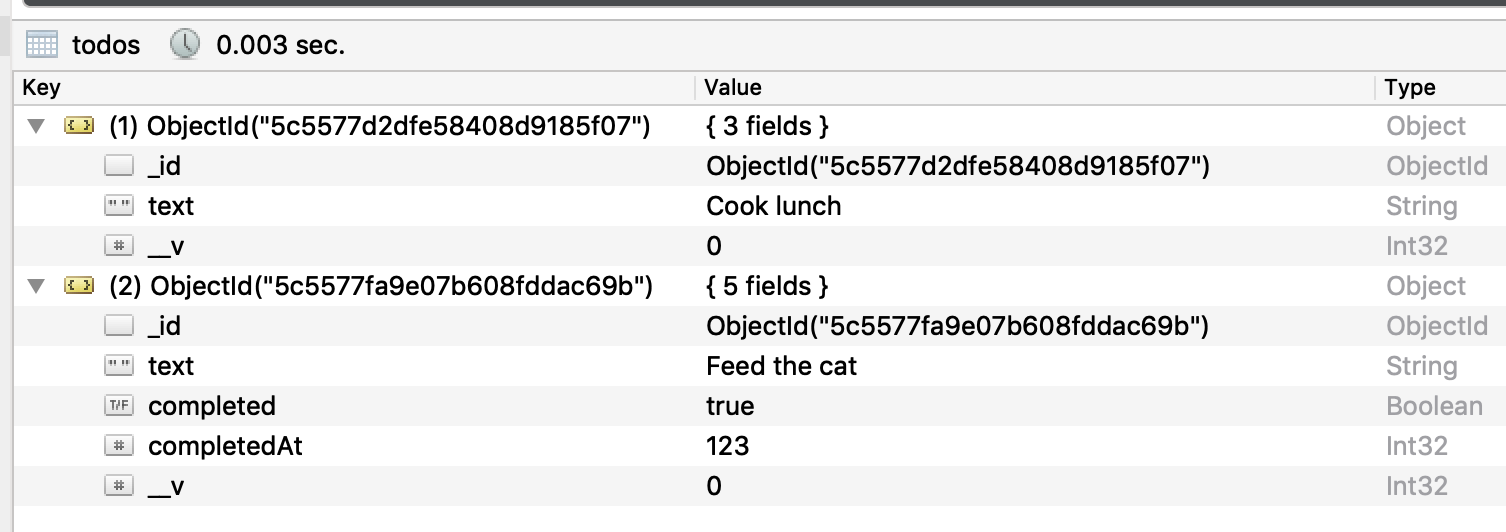
Your todos will be available then :
Using Postman
1. Go to getpostman.com
Download postman for our api tools from https://getpostman.com and install it.
2. Open Postman and play around with it
Add POST /todos Route
1. Install express and body-parser
To work with api, we will install two additional tools, they are express and body-parser. Open your terminal, go to your project directory and type the following command:
|
1 |
npm i express@4.16.4 body-parser@1.18.3 --save |
2. Refactor server.js
We will modify the server.js for better file management. At first, create a new folder ‘db’ inside server folder, and then create a mongoose.js file inside db directory :
mongoose.js
|
1 2 3 4 5 6 |
const mongoose = require('mongoose'); mongoose.Promise = global.Promise; mongoose.connect('mongodb://localhost:27017/TodoApp',{ useNewUrlParser: true }); module.exports = {mongoose}; |
Next, inside the server folder, create another folder ‘models’ and create two files inside it. The todos.js and user.js
todos.js
|
1 2 3 4 5 6 7 8 9 10 11 12 13 14 15 16 17 18 19 20 |
const mongoose = require('mongoose'); const Todo = mongoose.model('Todo', { text: { type: String, required: true, minlength: 1, trim: true }, completed: { type: Boolean, default: false }, completedAt: { type: Number, default: null } }); module.exports = {Todo}; |
user.js
|
1 2 3 4 5 6 7 8 9 10 11 12 |
const mongoose = require('mongoose'); const User = mongoose.model('User', { email: { type: String, required: true, trim: true, minlength: 1 } }); module.exports = {User}; |
Now, refactor server.js :
server.js
|
1 2 3 4 5 6 7 8 9 10 11 12 13 14 15 16 17 18 19 20 21 22 23 24 25 26 |
const express = require('express'); const bodyParser = require('body-parser'); const {mongoose} = require('./db/mongoose'); const {Todo} = require('./models/todo'); const {User} = require('./models/user'); const app = express(); app.use(bodyParser.json()); app.post('/todos',(req,res) => { var todo = new Todo({ text: req.body.text }); todo.save().then((doc) => { res.send(doc); }, (e) => { res.status(400).send(e); }); }); app.listen(3000, () => { console.log('Started on port 3000'); }); |
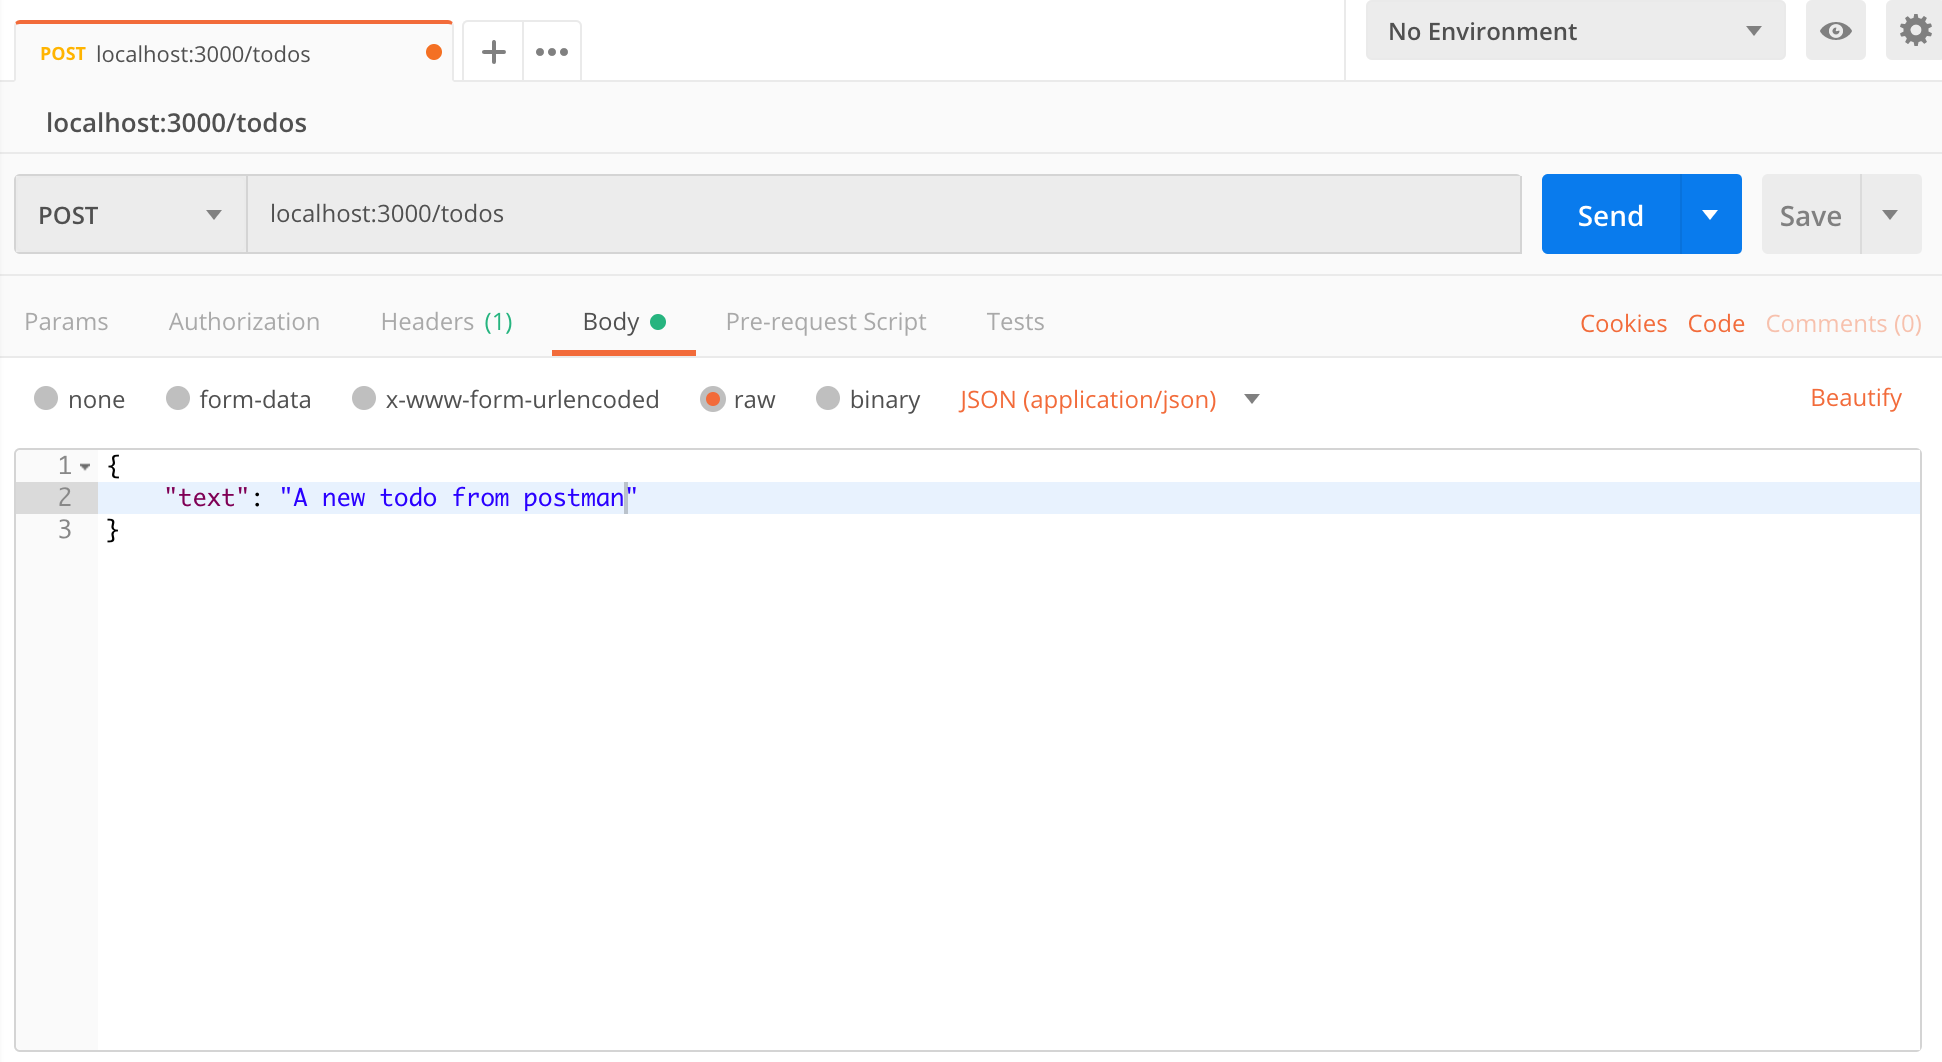
3. Create a new todo from Postman
Now that the files are ready, run your server by typing node server/server.js inside your project directory. Don’t forget to run your mongodb server (go to the mongo/bin folder and type the following command to activate : ./mongod –dbpath ~/mongo-data/).
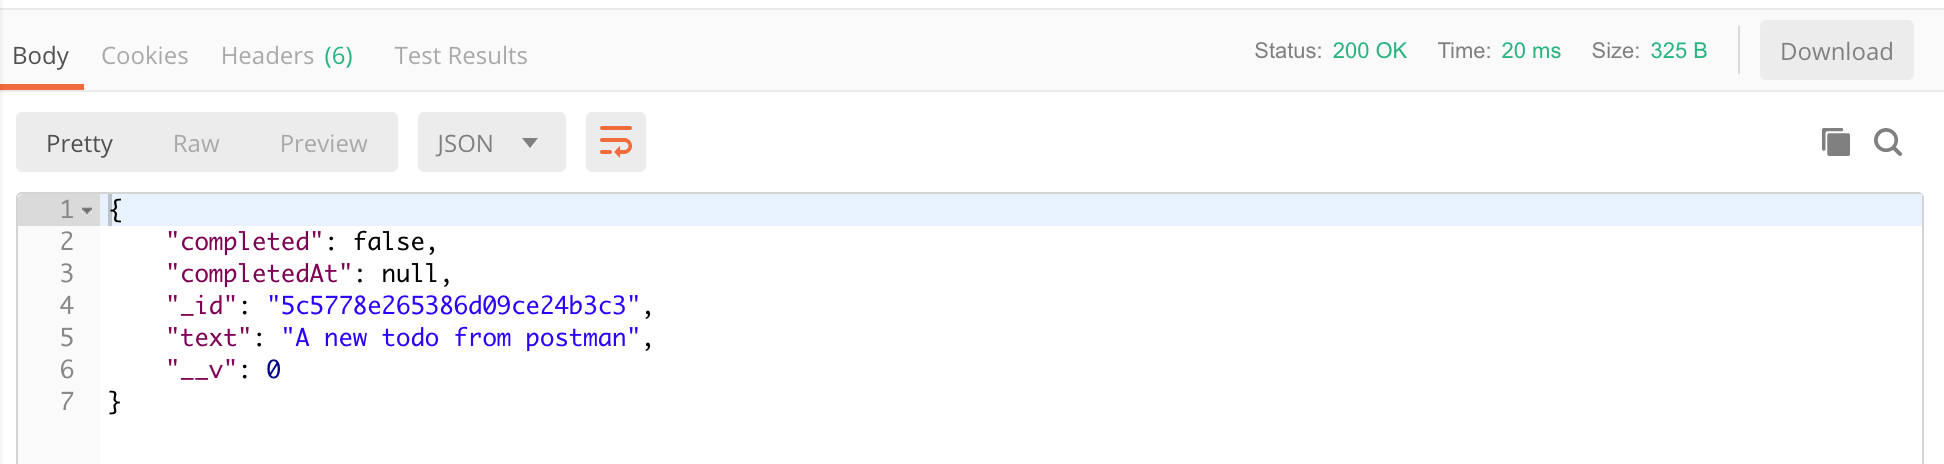
Open Postman and type the endpoint : localhost:3000/todos. Open the Body tab, choose raw and pick JSON(application/json) from the dropdown. Try to insert one todo:
If everything goes well, you will have a new todo on your mongo database.
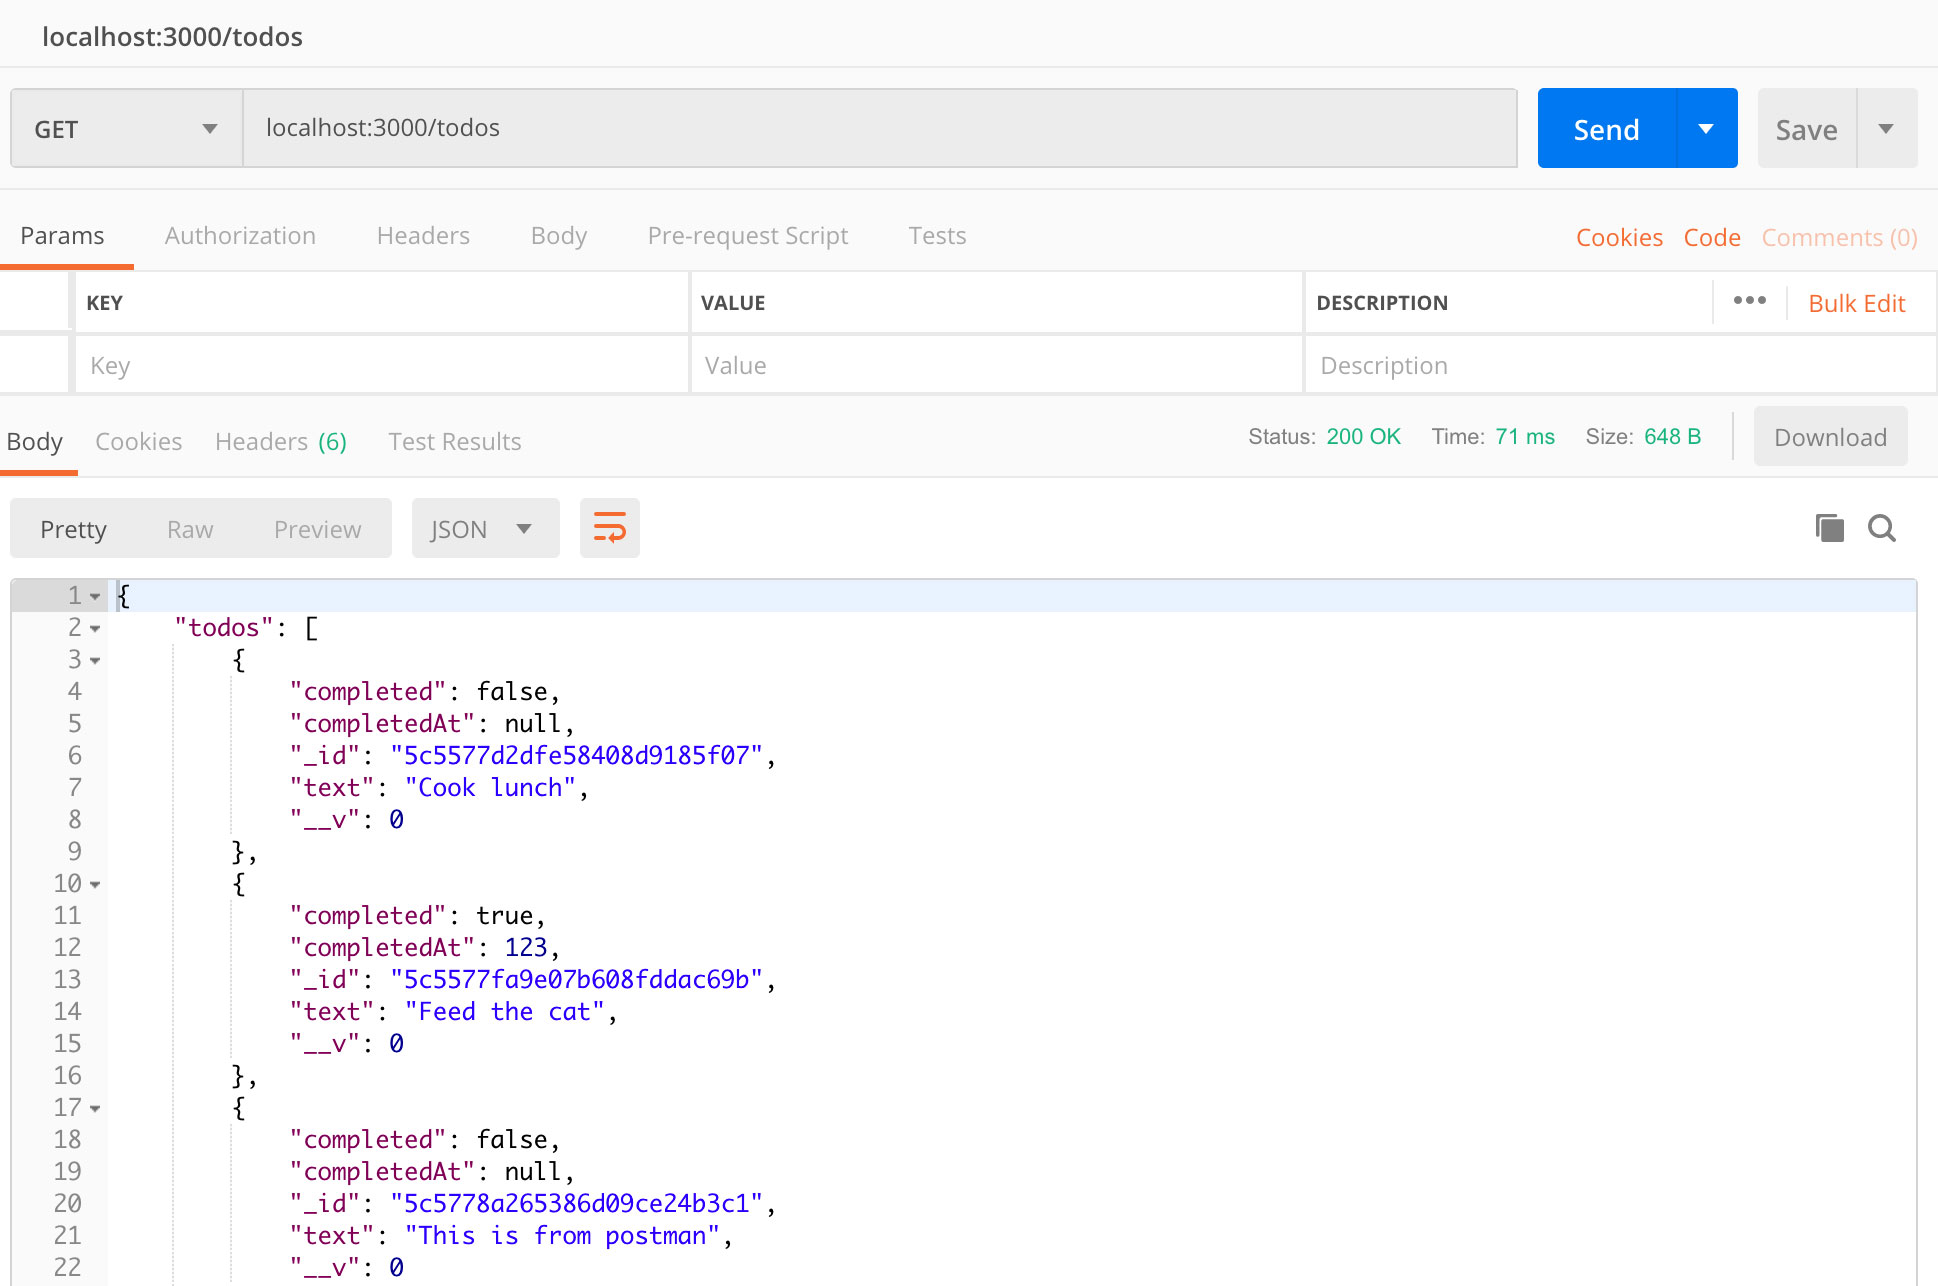
GET /todos Route
Next route is to fetch all the todos from our mongoDB database.
1. Modify server.js to add the GET route :
|
1 2 3 4 5 6 7 |
app.get('/todos', (req,res) => { Todo.find().then((todos) => { res.send({todos}); },(e) => { res.status(400).send(e); }); }); |
2. Open Postman and try to fetch the data using GET
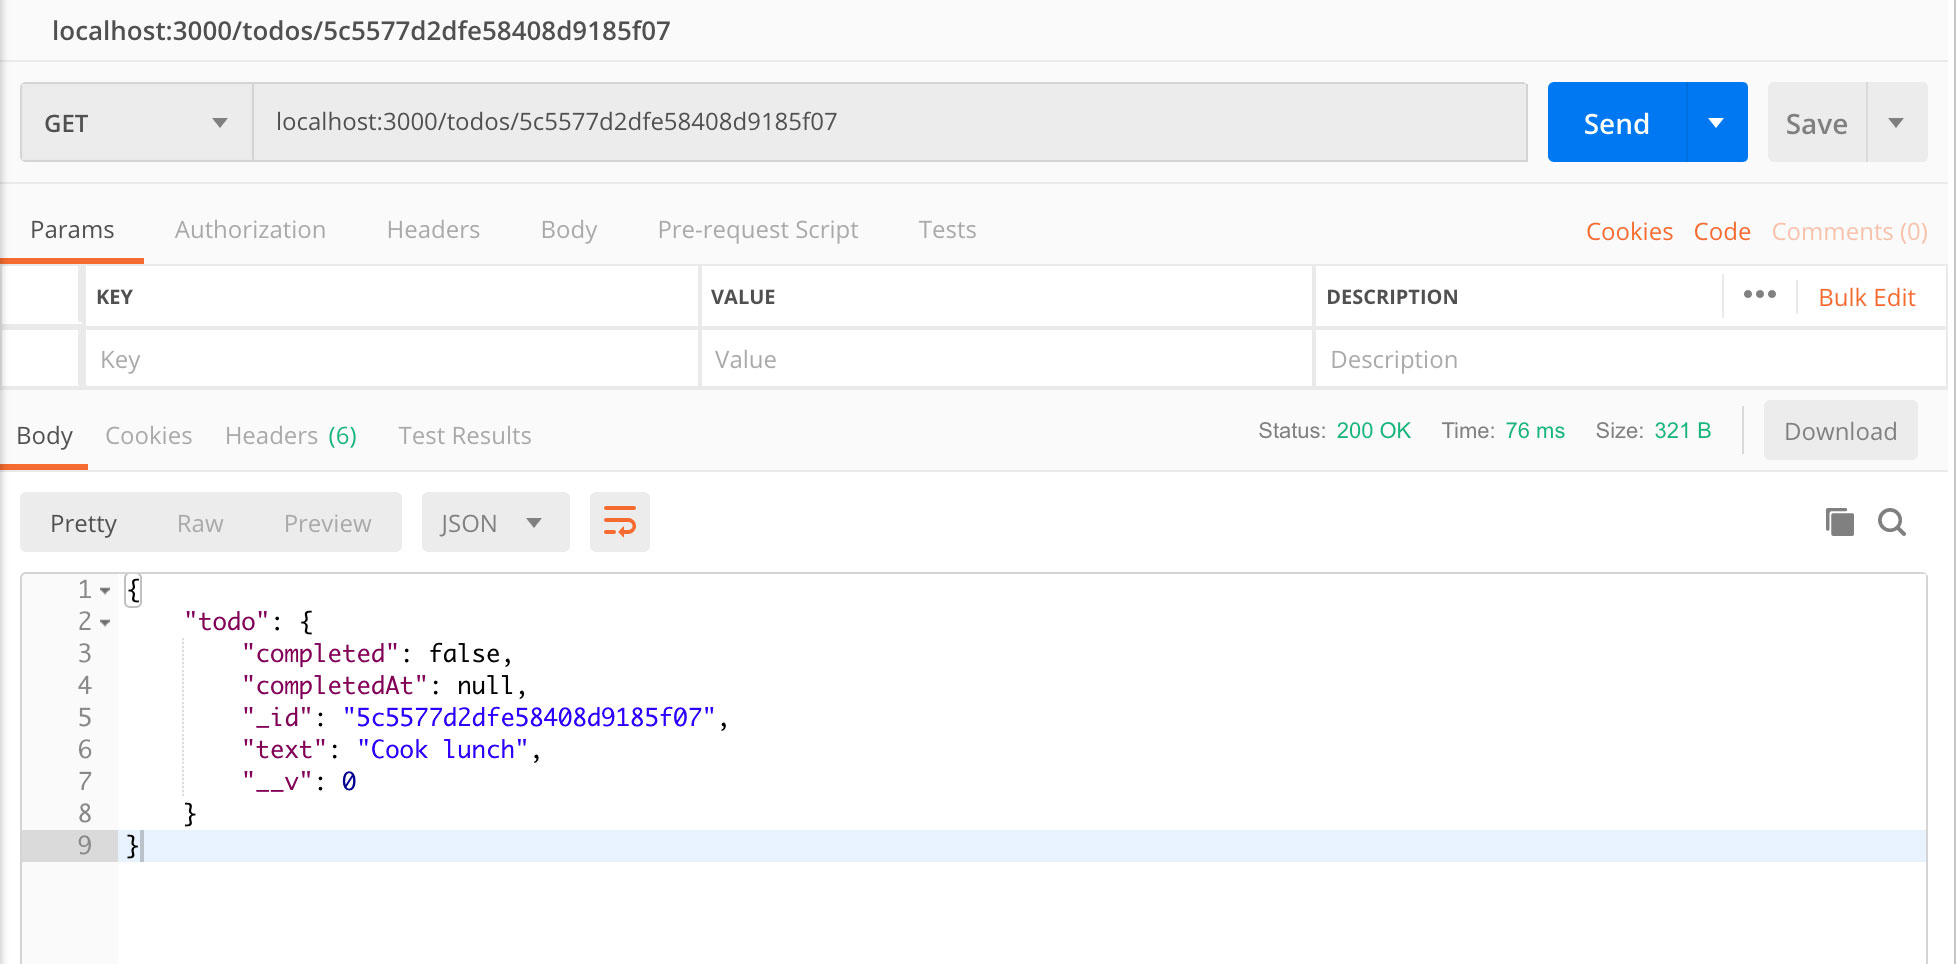
Getting Individual Resource using GET /todos Route
1. Modify server.js by Adding the following route:
|
1 2 3 4 5 6 7 8 9 10 11 12 13 14 15 16 |
app.get('/todos/:id',(req,res) => { const id = req.params.id; if(!ObjectID.isValid(id)){ return res.status(404).send(); } Todo.findById(id).then((todo)=>{ if(!todo){ return res.status(404).send(); } res.send({todo}); }).catch((e) => { res.status(400).send(); }); }); |
2. Open Postman and try to fetch the data using GET
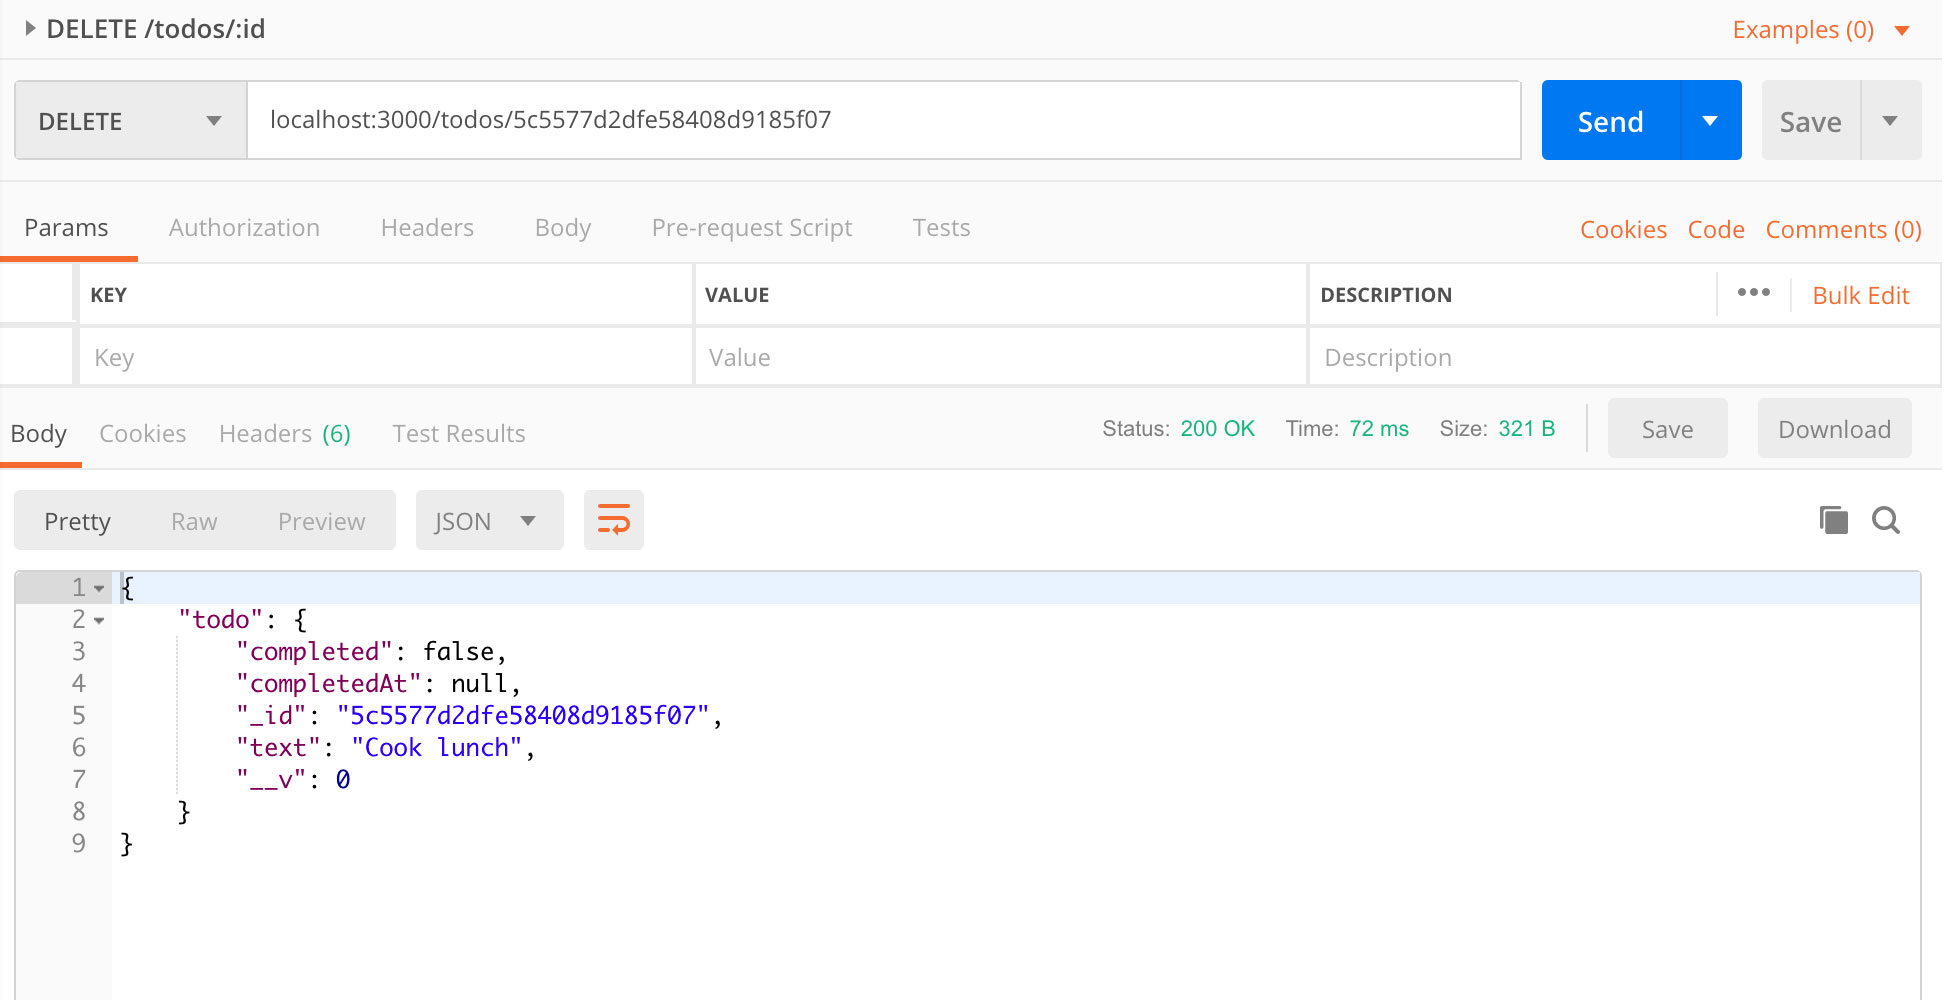
DELETE a Resource using DELETE /todos/:id Route
1. Modify server.js by Adding the DELETE route:
|
1 2 3 4 5 6 7 8 9 10 11 12 13 14 15 16 |
app.delete('/todos/:id',(req,res) => { var id = req.params.id; if(!ObjectID.isValid(id)){ return res.status(404).send(); } Todo.findByIdAndRemove(id).then((todo)=>{ if(!todo){ return res.status(404).send(); } res.send({todo}); }).catch((e) => { res.status(400).send(); }); }); |
2. Open Postman and try to delete a todo
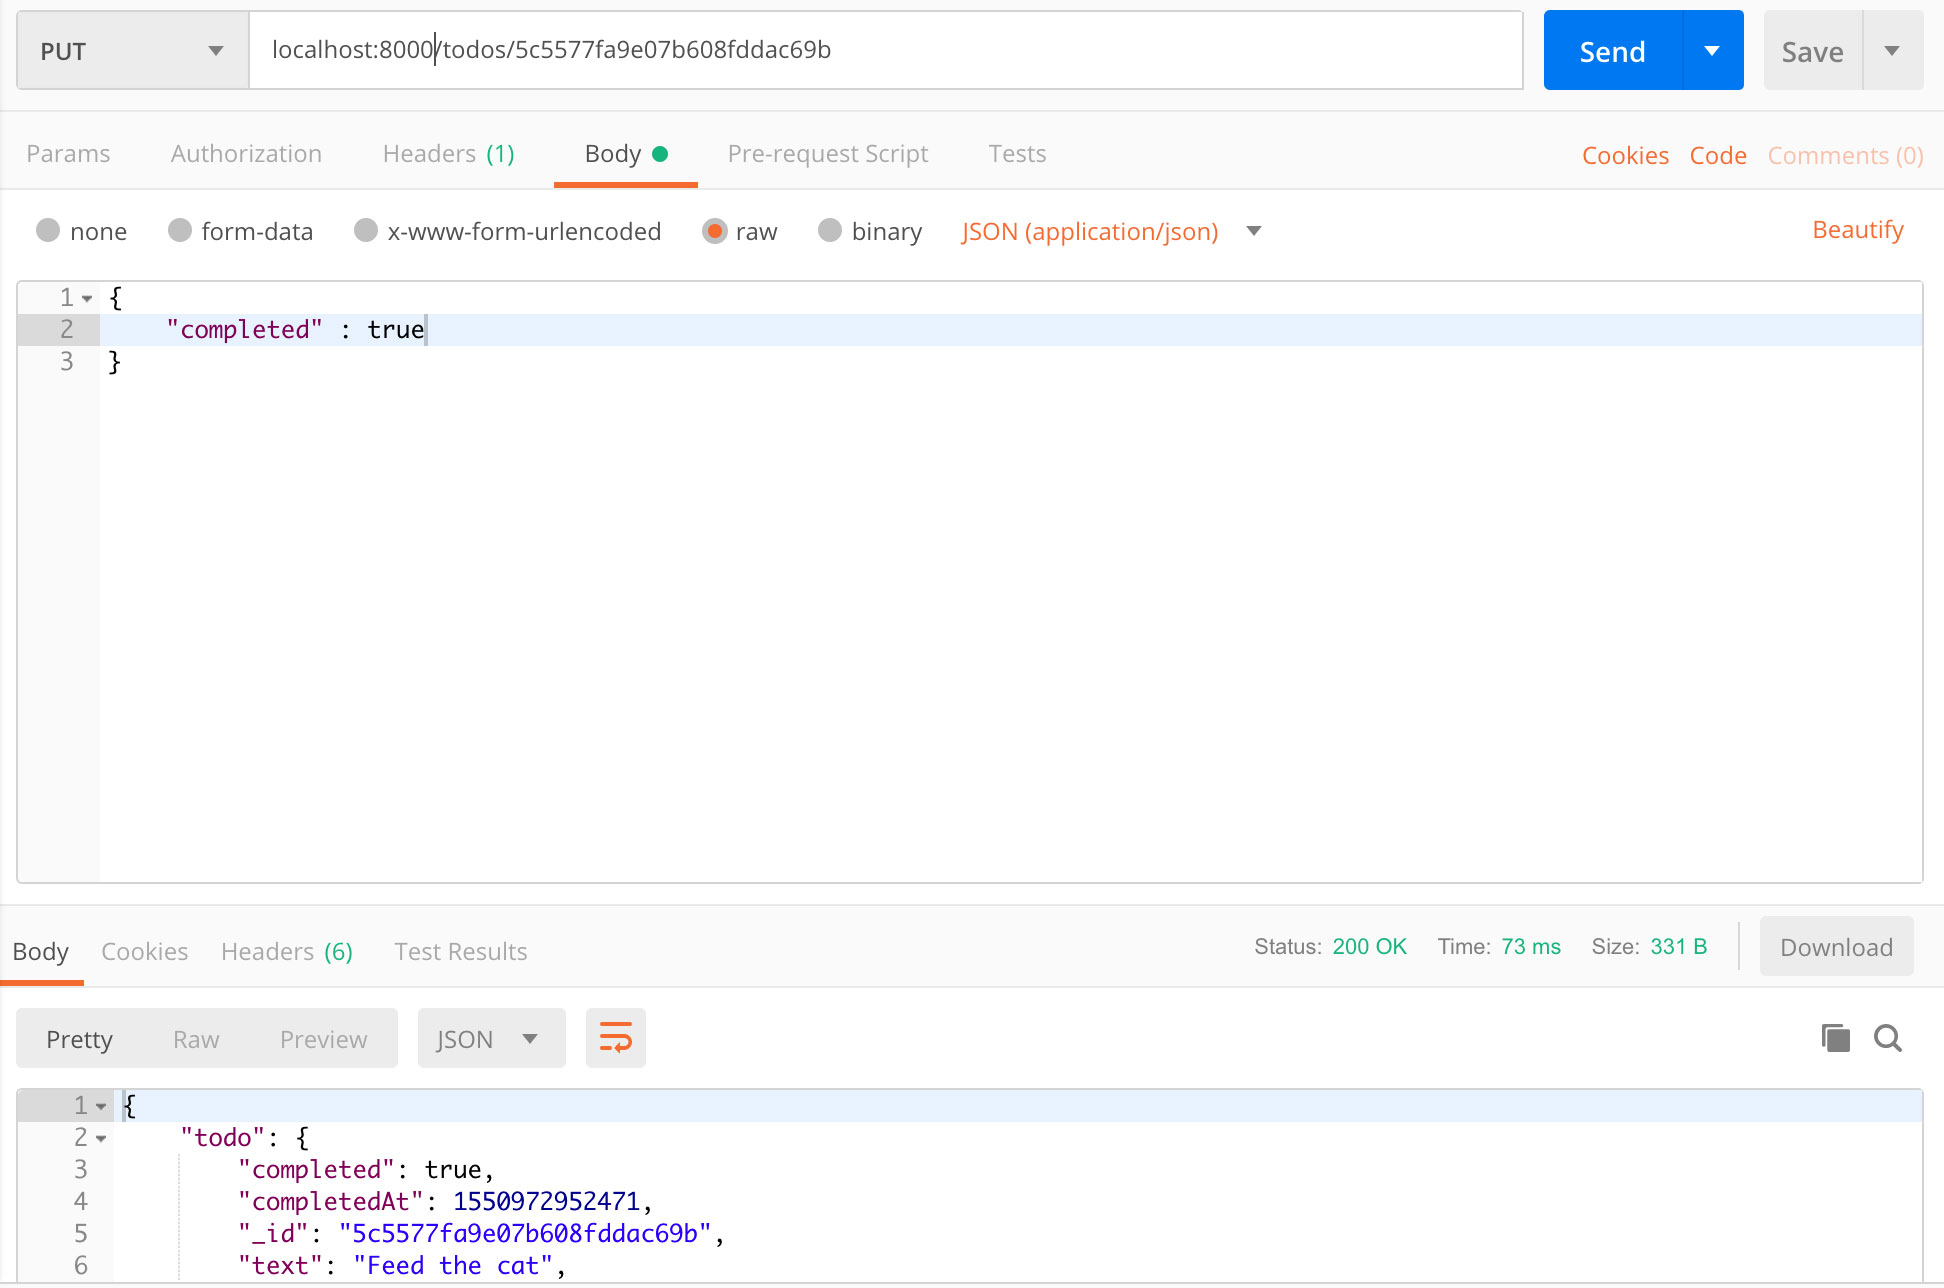
Updating a Resource using PUT /todos/:id Route
1. Installing lodash
We will use a “pick” method from lodash, so we need to install it :
|
1 |
npm install --save lodash |
2. Update server.js by adding PUT route
|
1 2 3 4 5 6 7 8 9 10 11 12 13 14 15 16 17 18 19 20 21 22 23 24 |
app.put('/todos/:id',(req,res) => { var id = req.params.id; var body = _.pick(req.body, ['text','completed']); if(!ObjectID.isValid(id)){ return res.status(404).send(); } if(_.isBoolean(body.completed) && body.completed){ body.completedAt = new Date().getTime(); }else{ body.completed = false; body.completedAt = null; } Todo.findByIdAndUpdate(id,{$set:body},{new: true}).then((todo)=>{ if(!todo){ return res.status(404).send(); } res.send({todo}); }).catch((e) => { res.status(400).send(); }); }); |
3. Open Postman and try it out